Tuesday, April 16, 2013

EyeMakeUp Tutorial


        To start off make a new layer and change the blending mode to color. Then select some color and use the brush tool on the eyelid. Afterwards make a new layer and change the blending mode color.  Then make a new layer and use a new color then color the upper eyelid and paint a new color. After that use the eyedropper tool to copy the color of the eyelashes and then make a new layer and change the blending mode to multiply and paint on the eyelashes.

Monday, April 15, 2013

Hair color


      This is a way to get your hair dyed by using Photo Shop. First upload an image and switch to quick mask mode. Then using the brush tool color over the area you want to dye (notice the color is automatically a transparent red. After you are done "dying" your hair go to Select tab and click inverse and then go to adjustments and use the Hue/Saturation tab and that is it.

Friday, April 12, 2013

EyeMakeUp


                        Clearly the top image is the real image and the bottom image is the better image. Began by using the elliptical marque tool and make a circle around the eye but leave a bit of space. Then make a layer mask and make a Gaussian blur into the layer mask. Then delete the eyelid off of the mask by using the paintbrush tool with the color black. Lastly simply click on the new adjustment layer icon while holding down the Alt key and click on "Use previous layer to create clipping mask" then just change the color of then iris.

matrixchairthing


The top image is the original image and the bottom image is the matrix image. You should began by simply erasing away the chair and the using the polygonal lasso tool and clone some grass to put in the empty void where the chair was. After that's done use the polygonal lasso tool on a new layer so you can add a shadow effect under the man by going to stroke and put 4 pixels for the width use the color black and location would be inside. right after that  use a Gaussian blur on the shadow and then if you want fix the grass by using the spot healing brush.

Thursday, April 11, 2013

Contentawarefill


   I would like to begin by saying the original is the one on top and the one on the bottom is the new and improved version of it. All you must simply do is get rid of the giant pole and the small pole, because they are very distracting. First you must select the polygonal lasso tool and make a shape somewhat close to the borders of the objects you want to remove. after making a closed object around the item to be removed go to edit then fill and in the fill options select content aware and that is it.

Wednesday, April 10, 2013

AcneandSpotHealing


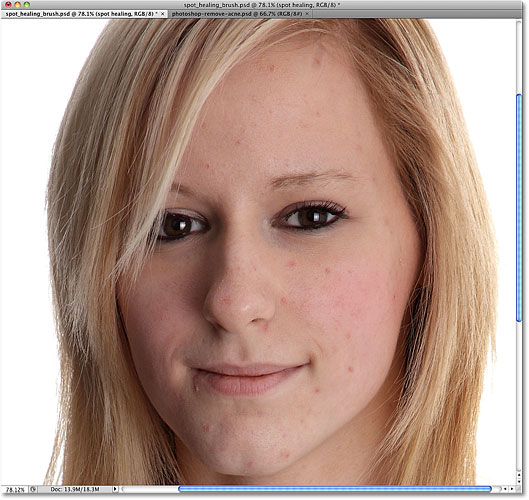
This tutorial was to father increase the skills for the spot healing brush. Start by having an image then create a new blank layer and click on sample layers on the options and simply click on any pimples and change the lighten or darken mode to make areas darker or lighter.

BabyTruck_andPisaTower


                 This assignment was formed of two tutorials which featured the stamp tool. The first assignment was the baby bus which consisted of a few level adjustments a clone stamp, and a burn effect. The first step was to make the level adjustments and to do that simply change the box in the middle to 85 and the box on the right to 222. Now we create a clone stamp by using a brush of 50 pixels and 0% hardness then just press the alt key and right click to claim the source point. After that we select the source point options and change the opacity to 25% if not done already. We also change the height and width to 30% to symbolize a baby bus. Later we erase what ever we don't want on the truck such as empty white spaces. After doing so we add a burn effect to the baby truck with the burn tool. The next step is rather simple....simply add an exposure adjustment layer and set the values to...exposure...+0,20....offset....-0,0050......gamma correction.....0,75 and also add a gradient map and make both adjustment a linear burn to add elegance to the baby bus. Finally add a blur by going under filter then blur and then blur again. (hint: remember to keep the actual image and the "baby image" on separate layers before cloning)
                 Start  by using a picture of the leaning tower of Pisa. Then swiftly add a levels adjustment of 0, then 1,35 and lastly 200. Afterwards create a new layer and name it straight tower. Now we go back to the original image layer and select a clone source near the tower. After selecting the clone source we select the clone source options and change the angle to 4. The we bring out a vertical guide line to show us what the tower should look like (straight.) After this switch back to the straight tower layer and began using the clone stamp tool; as you do this you may notice that the tower behind it is disappearing and that is exactly what we want. Lastly fix any mistake you might have made while making the tower.